


Introduction:
In today’s fast-paced world of software development, the integration of security into every stage of the development lifecycle is no longer a luxury — it’s a necessity. DevSecOps practices have emerged as a solution to seamlessly weave security into the fabric of DevOps processes, ensuring that applications are not only developed and deployed rapidly but are also fortified against ever-evolving threats.
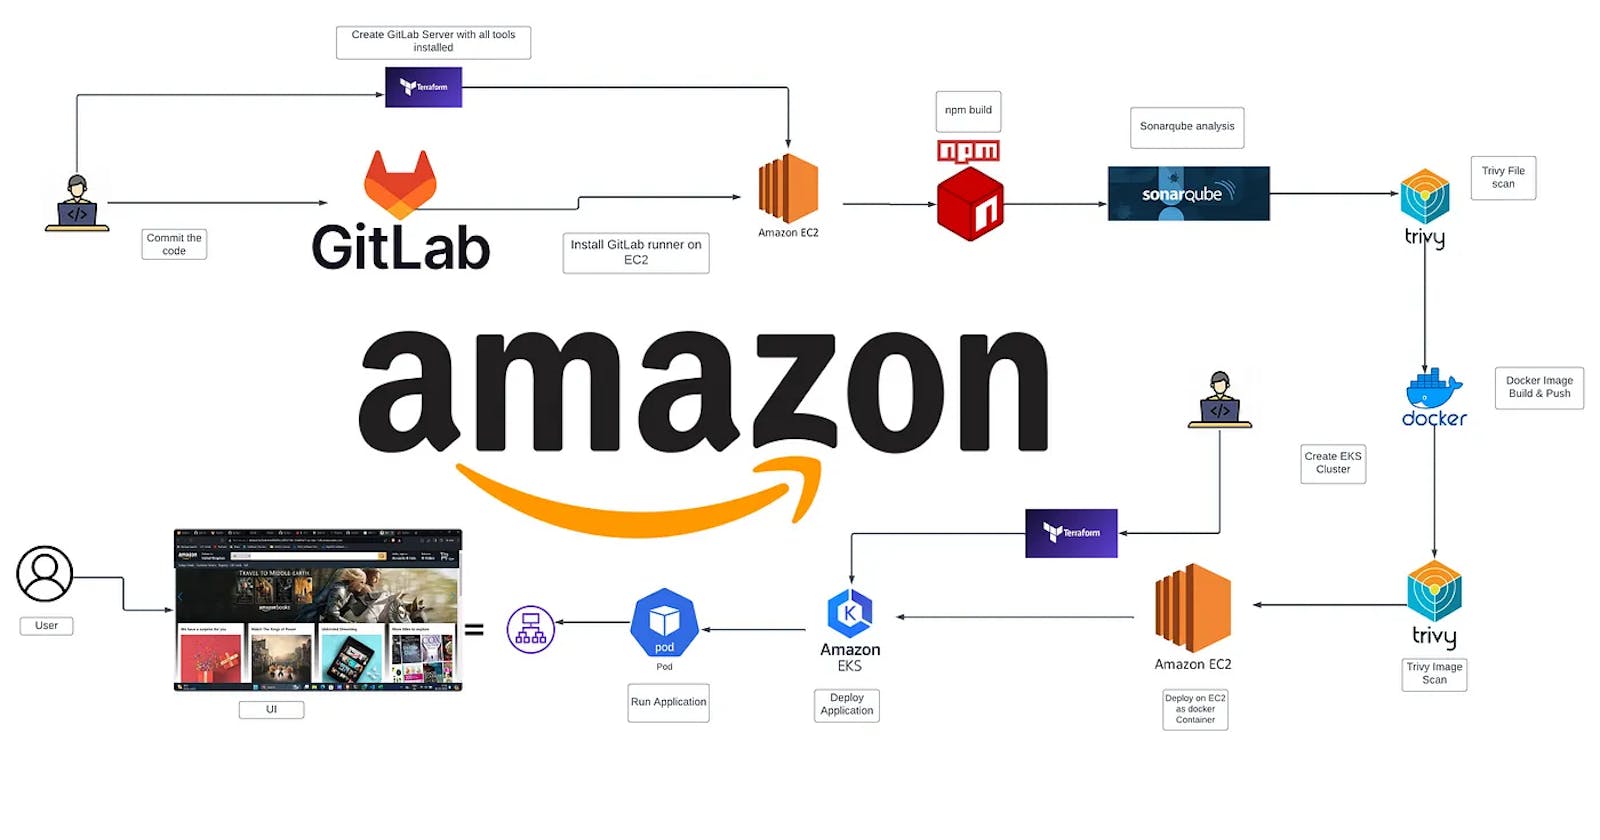
In this blog post, we’ll embark on a journey that combines the power of GitLab CI/CD, Amazon EKS (Elastic Kubernetes Service), and an arsenal of cutting-edge security tools to deploy our application securely on AWS infrastructure. Leveraging the robust capabilities of GitLab CI/CD, we’ll automate our pipeline, from code commits to production deployment, while simultaneously integrating comprehensive security checks at each step.
But our commitment to security doesn’t stop there. We’ll employ Trivy to scan our Docker images and files for vulnerabilities, ensuring that only the most secure artifacts make their way into our deployments. Additionally, we’ll harness the analytical prowess of SonarQube to conduct in-depth code analysis, guaranteeing that our application’s codebase adheres to the highest standards of quality and security.
Join us as we dive deep into the world of DevSecOps, where speed and security converge harmoniously to deliver robust and resilient applications in the cloud. Let’s embark on this journey together, embracing the ethos of DevSecOps to build a safer digital future.
Prerequisites:
GitLab Account.
AWS Account.
Create a Dynamo table with name “Lock-Files”
Create an S3 bucket.
An IAM User Access Keys.
A AWS Key Pair.
Terraform and AWS CLI installed.
STEPS:
STEP 1 :- Create an EC2 Server.
- Clone the GitLab Repository.
GitLab Repo: https://gitlab.com/project_devops3/Amazon_Clone.git
git clone https://gitlab.com/project_devops3/Amazon_Clone.git
2. Navigate to GitLab-Server-TF
3. Do some modifications to the backend.tf file such as changing the bucket name and DynamoDB table with created ones.
4. Now, you have to replace the Pem File name with one already created on AWS in variables.tfvars.
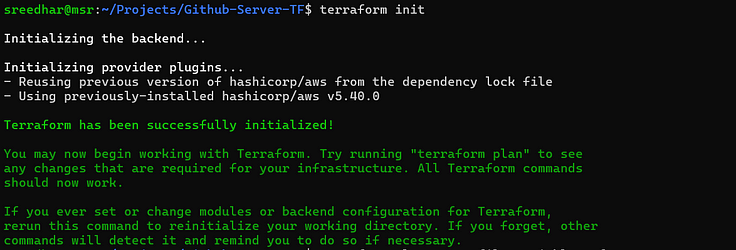
5. Initialize the backend by running the below command.
terraform init
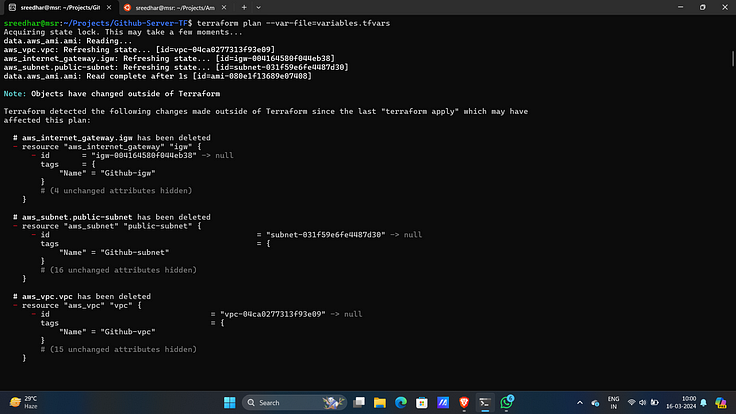
6. Run the below command to get the blueprint of what kind of AWS services will be created.
terraform plan -var-file=variables.tfvars
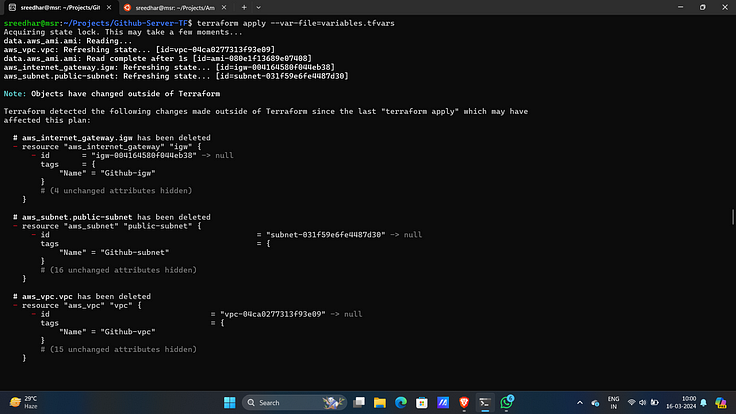
7. Now, run the below command to create the infrastructure on AWS Cloud which will take 3 to 4 minutes maximum.
terraform apply -var-file=variables.tfvars --auto-approve
8. Now this will create an EC2 server on AWS.
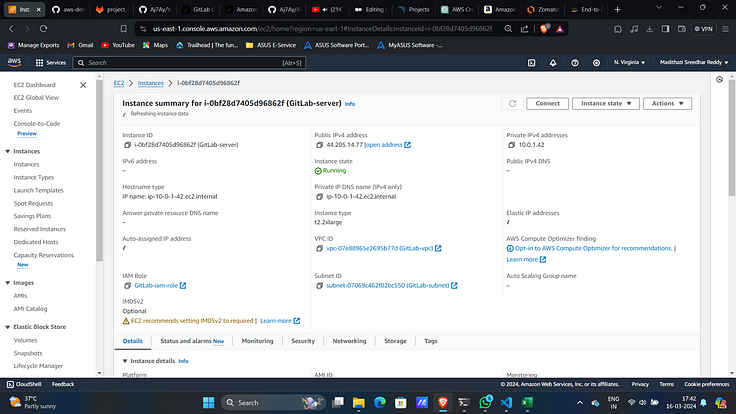
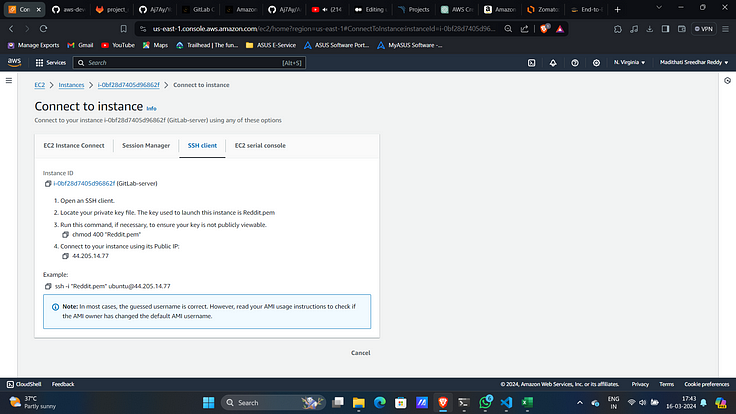
9. Now connect to it with created Key-Pair.
STEP: 2 :- Configure SonarQube Server.
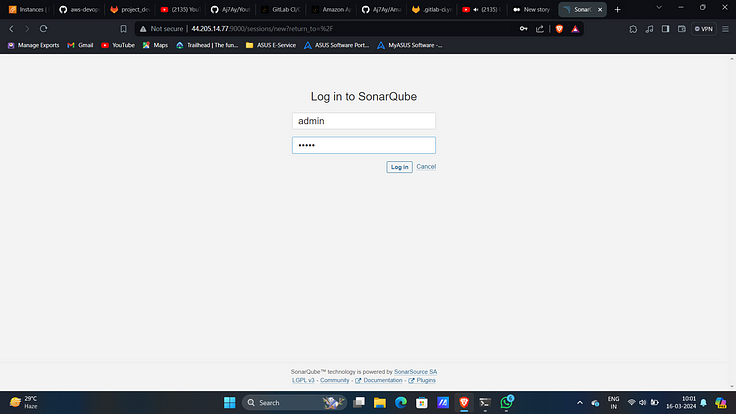
Access SonarQube on port 9000 of public Ip of EC2 server.
Login with “admin” as username and password.
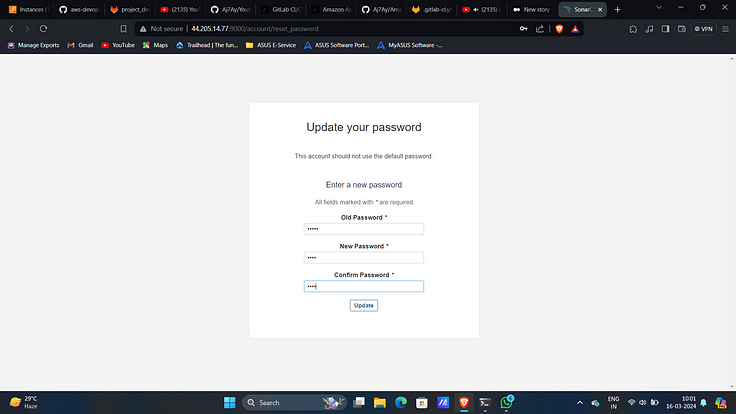
3. Update the password.
4. Click on “manually”.
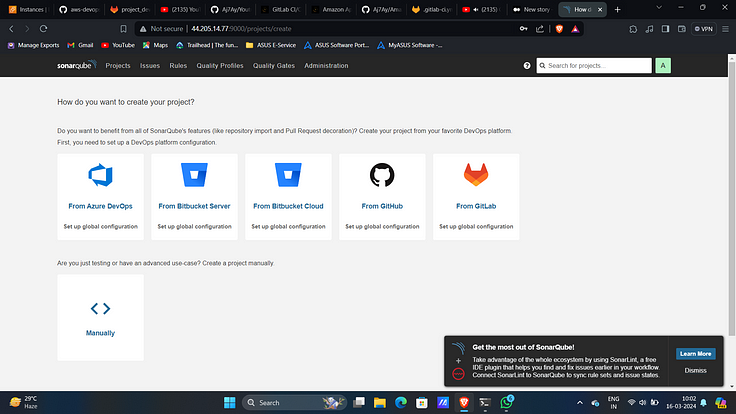
5. Provide a name and click on “Set Up”.

6. Select “With GitLab CI”.
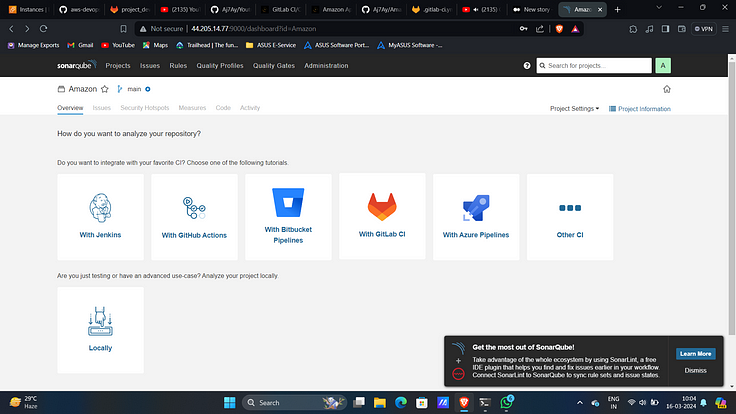
7. Select “Other” under best directories you build.
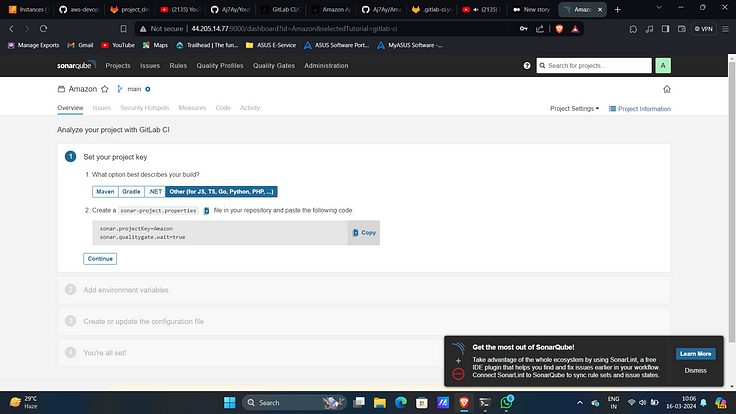
8. Create a repository in Gitlab and get into it.
9 . Create a file with name sonar-project.propertiesand Paste the content that you got from SonarQube.

10. Click on continue in SonarQube.
11. Click on “Generate Token”.
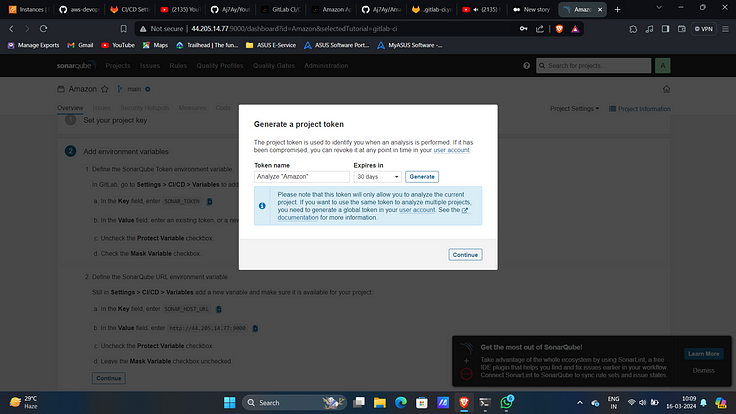
12. Generate it.
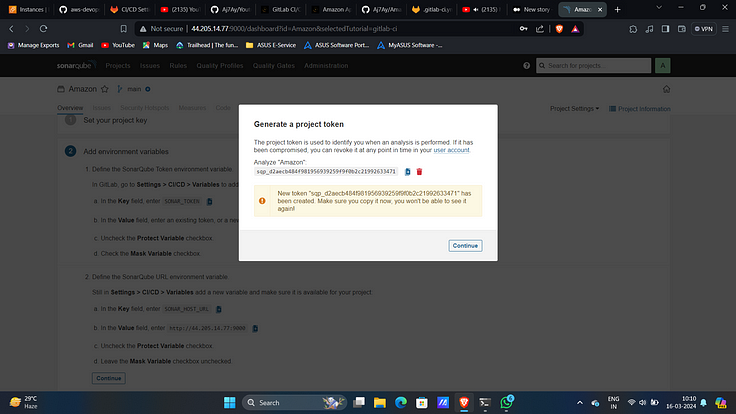
13. Now copy them and now go to GitLab Click on settings and CI/CD.
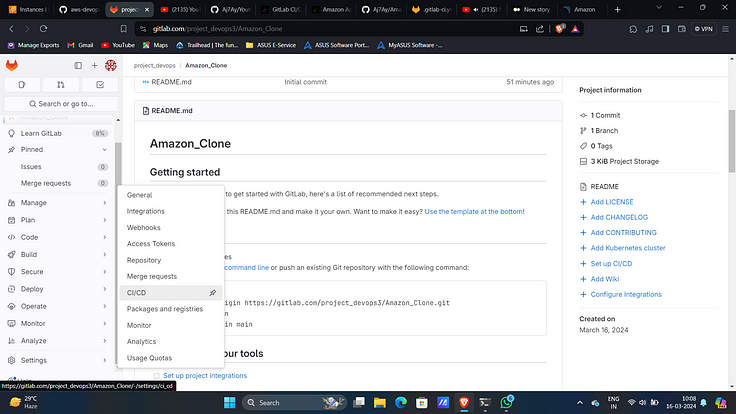
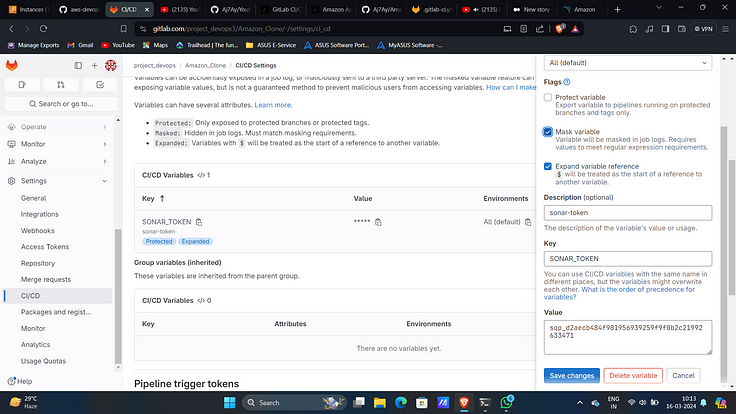
14. Under variables expand and click on “add variable”.
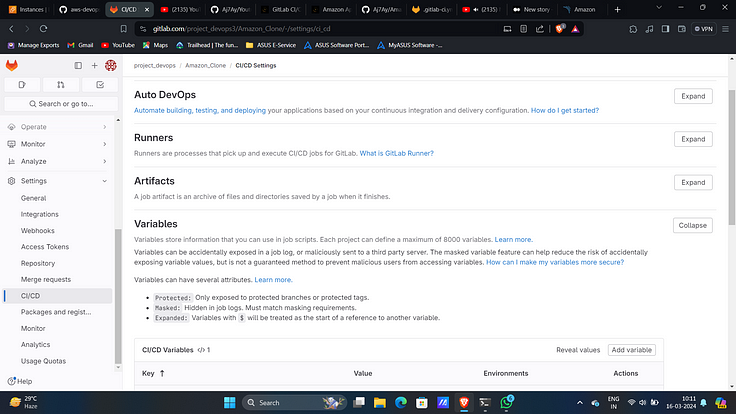
15. Add Created token with name “SONAR_TOKEN”.
16. Similarly copy the name and value of sonar-host.
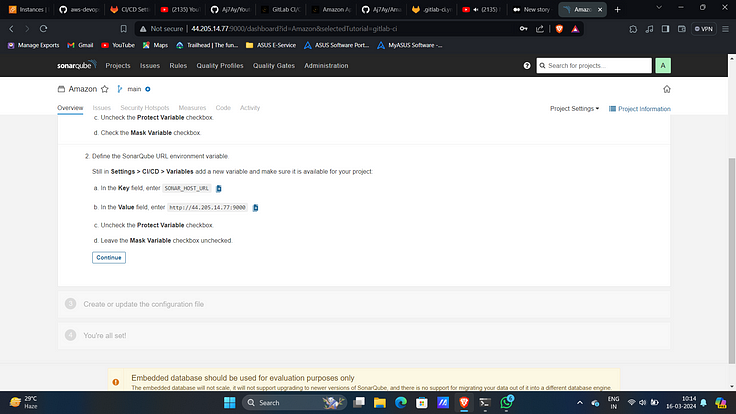
17. Add it as another variable with key “SONAR_HOST_URL”.
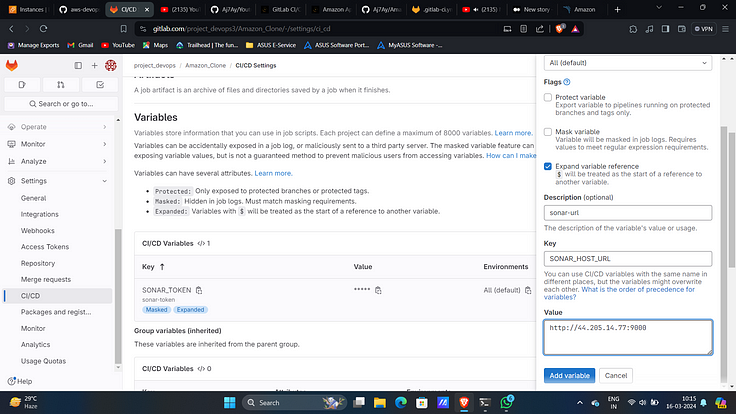
18. Click on Finish this tutorial.
19. Add docker username as another variable with key “DOCKER_USERNAME”.
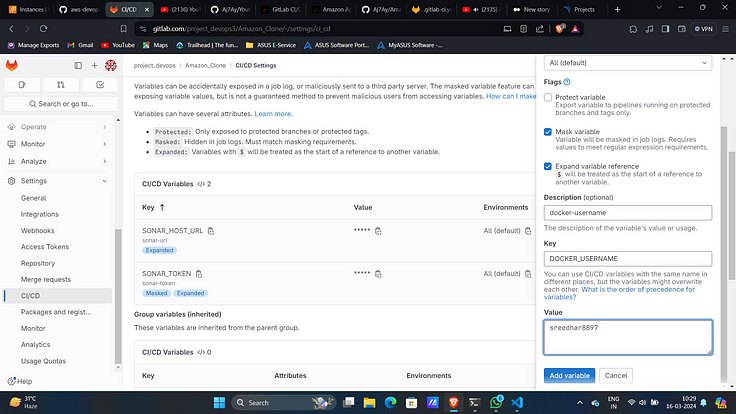
20. Similarly docker password as another variable with key “DOCKER_PASSWORD”.
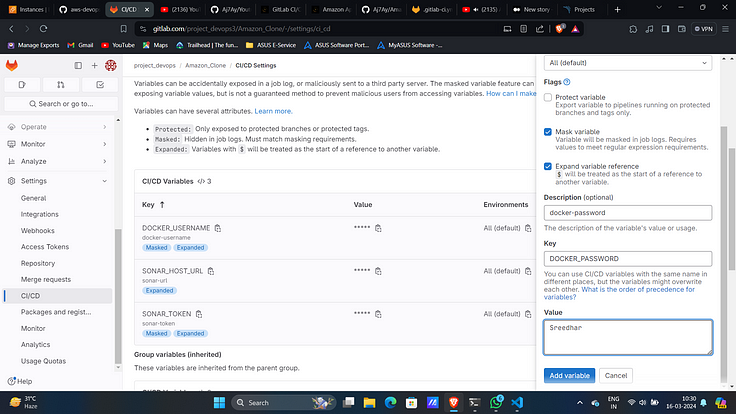
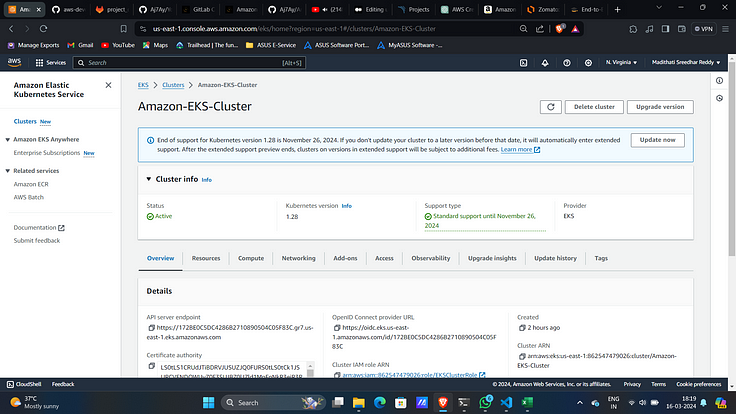
STEP 3 :- Create EKS Cluster
Navigate to EKS-TF folder.
Change backend.tf and variables.tfvars as before.
Initialize the backend by running the below command.
terraform init
4. Run the below command to get the blueprint of what kind of AWS services will be created.
terraform plan -var-file=variables.tfvars
5. Now, run the below command to create the infrastructure on AWS Cloud which will take 3 to 4 minutes maximum.
terraform apply -var-file=variables.tfvars --auto-approve
6. This will create an EKS cluster on AWS.
7. To apply the yaml files we need to give access to GitLab runner to access our cluster.
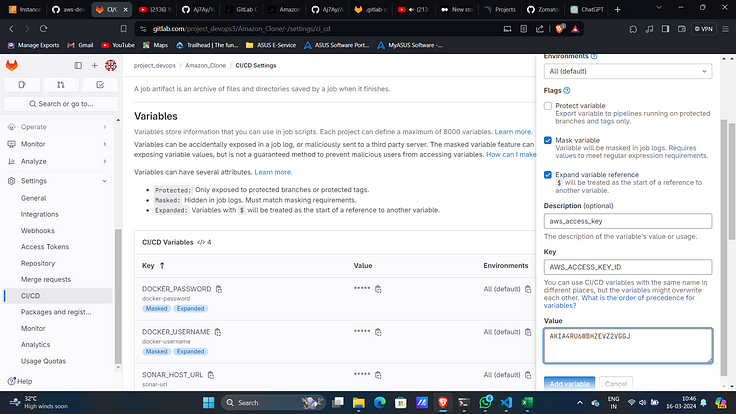
8. Add access key as another variable with key “AWS_ACCESS_KEY_ID”.
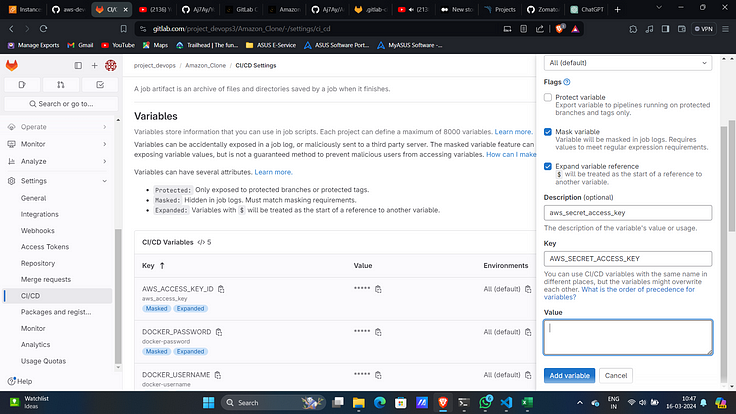
9. Similarly add secret access key as a variable with key “AWS_SECRET_ACCESS_KEY”.
10. Add region as another variable with key “AWS_REGION”.

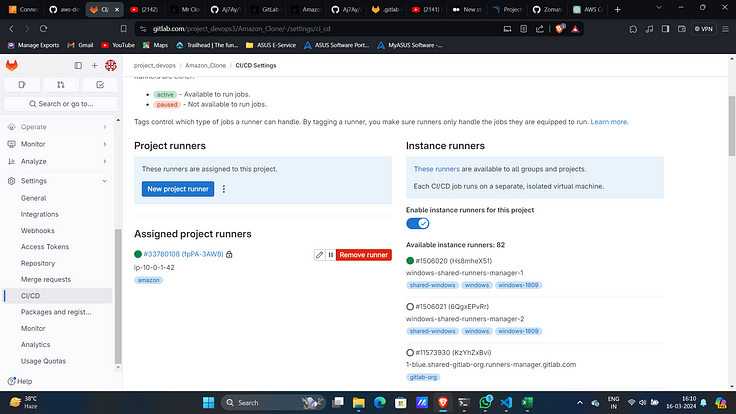
STEP 4 :- Install and Configure GitLab Runner on EC2
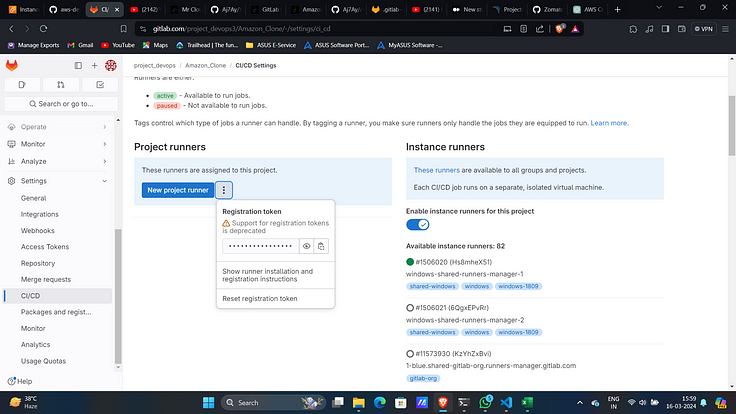
- Navigate to settings then CICD and then runners.
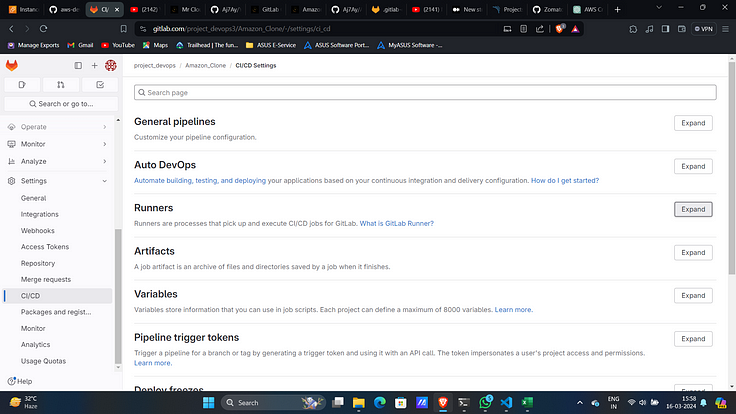
2. Expand runners and click on 3 dots and then “show runner installations and registration instructions”
3. Select Linux as environment and copy all commands under “Download and install binary”.
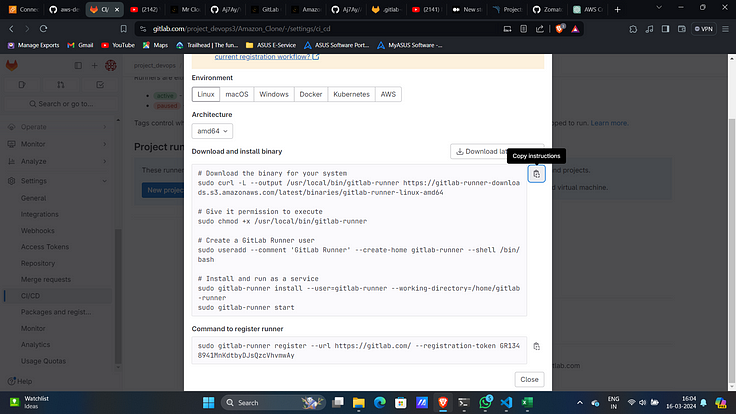
4. Add all of then in a file with any name and then give execute permissions for it and execute it.

5. Copy last command from GitLab and paste it on EC2 server.
Leave all of them as default but add your custom tags with commas(,)
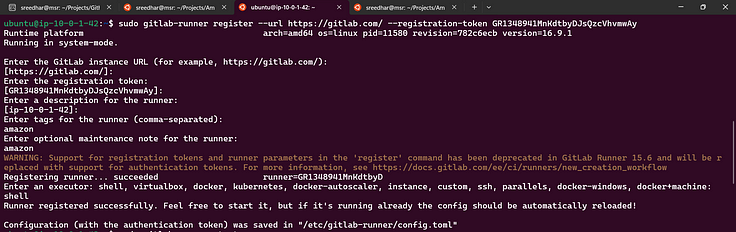
6. Start and run the GitLab-runner.
sudo gitlab-runner start
sudo gitlab-runner run

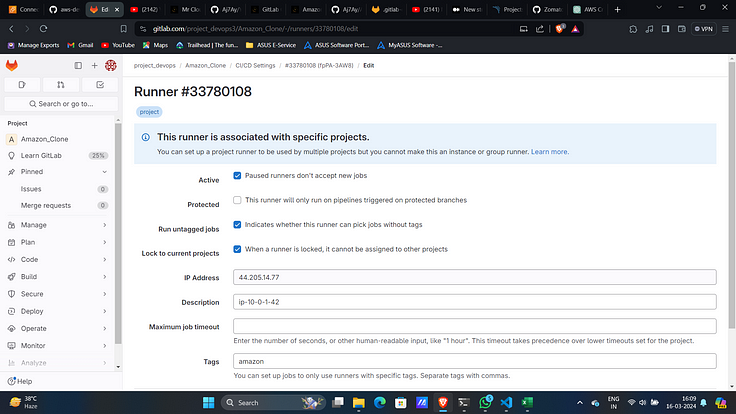
7. This will add a runner in GitLab.
8. Edit it and check “Run untagged jobs”.
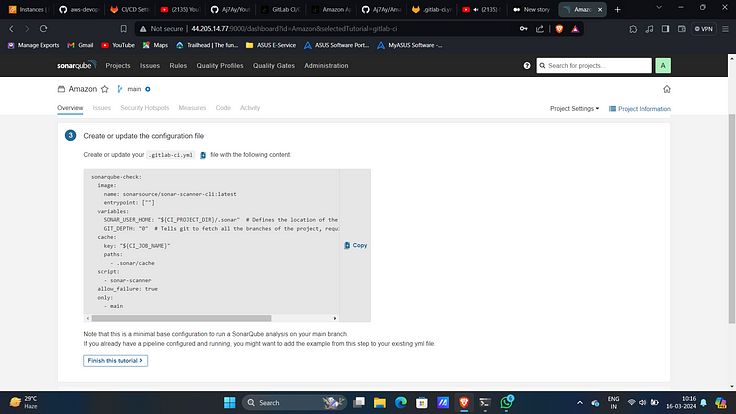
9. Now create a file with .gitlab-ci.yml file add this content.
stages:
    - npm
    - sonar
    - trivy file scan
    - docker
    - trivy image scan
    - deploy
Install dependecy:
    stage: npm
    image:
        name: node:16
    script:
        - npm install
sonarqube-check:
  stage: sonar
  image:
    name: sonarsource/sonar-scanner-cli:latest
    entrypoint: [""]
  variables:
    SONAR_USER_HOME: "${CI_PROJECT_DIR}/.sonar"  # Defines the location of the analysis task cache
    GIT_DEPTH: "0"  # Tells git to fetch all the branches of the project, required by the analysis task
  cache:
    key: "${CI_JOB_NAME}"
    paths:
      - .sonar/cache
  script:
    - sonar-scanner
  allow_failure: true
  only:
    - main
Trivy file scan:
  stage: trivy file scan
  image:
    name: aquasec/trivy:latest
    entrypoint: [""]
  script:
    - trivy fs .
Docker build and push:
  stage: docker
  image:
    name: docker:latest
  services:
    - docker:dind
  script:
    - docker build  -t amazon .
    - docker tag amazon sreedhar8897/amazon:latest
    - docker login -u $DOCKER_USERNAME -p $DOCKER_PASSWORD
    - docker push sreedhar8897/amazon:latest
Scan image:
  stage: trivy image scan
  image:
    name: aquasec/trivy:latest
    entrypoint: [""]
  script:
    - trivy image sreedhar8897/amazon:latest
deploy:
  stage: deploy
  tags:
    - amazon
  script:
    - docker run -d --name amazon -p 3000:3000 sreedhar8897/amazon:latest
    - aws configure set aws_access_key_id $AWS_ACCESS_KEY_ID
    - aws configure set aws_secret_access_key $AWS_SECRET_ACCESS_KEY
    - aws configure set region $AWS_REGION
    - aws eks --region us-east-1 update-kubeconfig --name Amazon-EKS-Cluster
    - kubectl apply -f deployment-service.yml
Replace the image names and cluster name as you created.
10. Then Commit the changes.
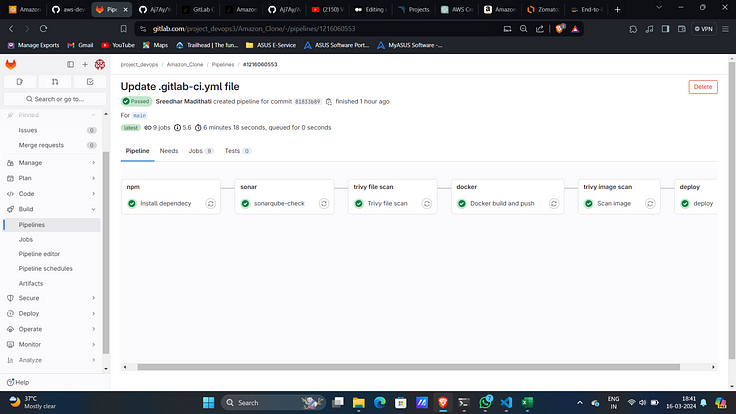
11. This will automatically create a pipeline and run it you can view it under build → pipeline section.
12. Upon successful execution.
SonarQube Analysis:

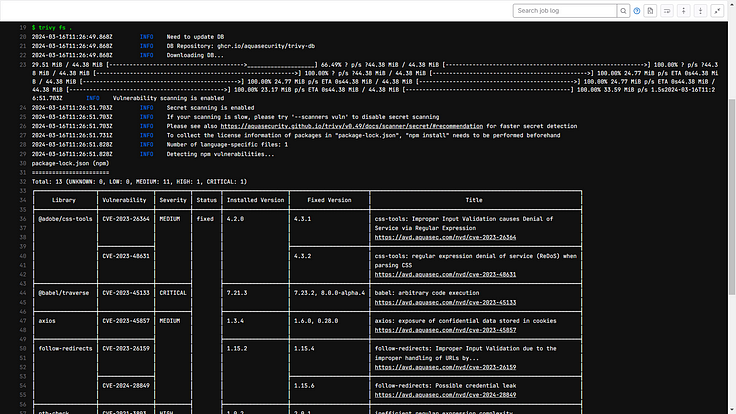
Trivy File Scan:
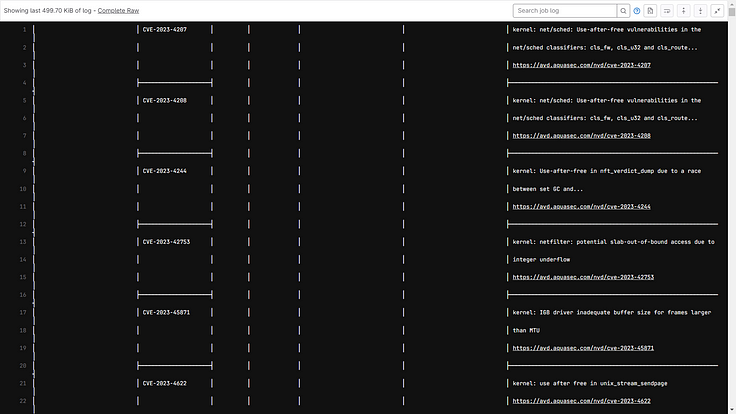
Trivy Image Scan:
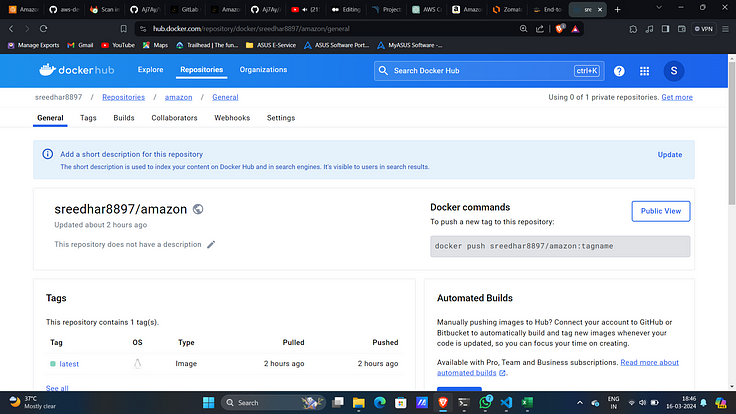
Docker Hub:
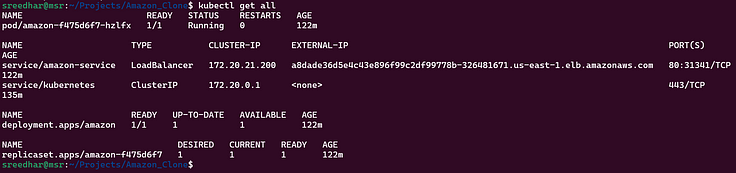
13. Ensure that the resources are up and running.
kubectl get all
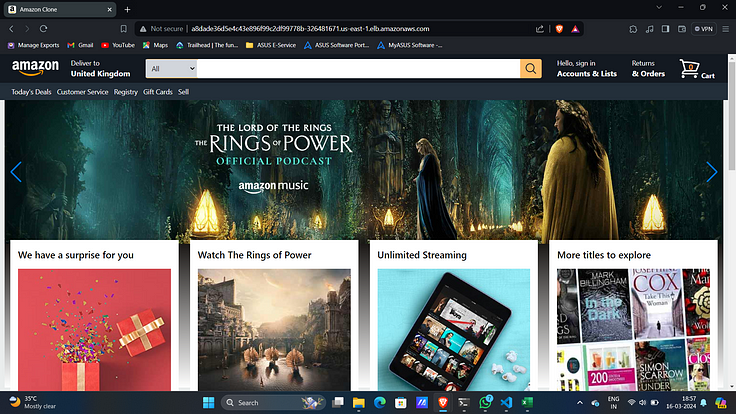
14. Access the application on port 3000 of EC2 server.
Note: Enable port 3000 in Security Group of EC2.

15. This will create a Load Balancer on AWS.
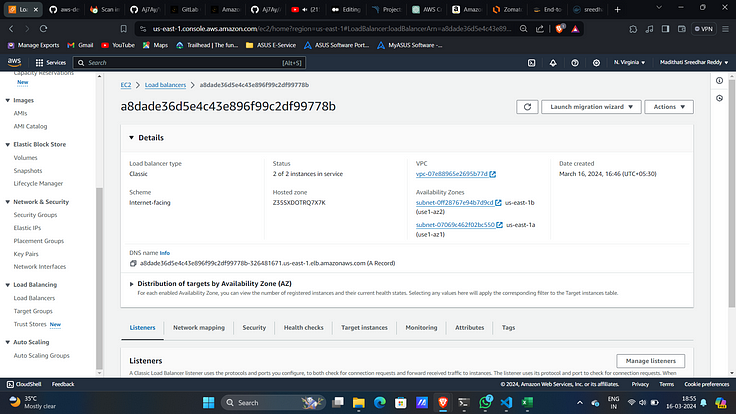
16. Copy the DNS name and paste it on your favourite browser.

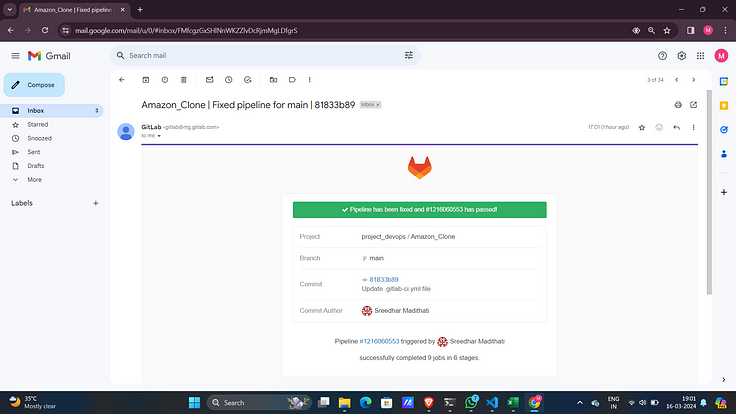
Another feature of GitLab is it will send notification to registered email the status of pipeline.
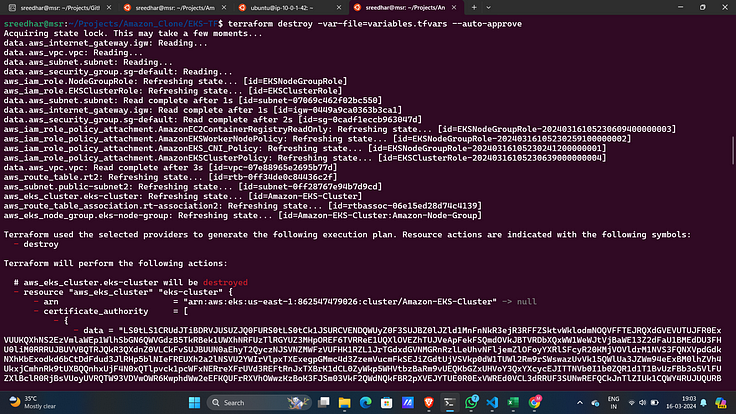
STEP 5 :- Clean Up
- This is very simple first delete the EKS cluster by running
cd EKS-TF/
terraform destroy -var-file=variables.tfvars --auto-approve
2. Destroy the GitLab Server by running.
cd GitLab-Server-TF/
terraform destroy -var-file=variables.tfvars --auto-approve

Thank you for reading my blog …:)
If you find it useful and worth reading Please clap and Follow me for more amazing projects.. :)